Let There Be Light – The Sequel. Good Bye Lamp House!
Okay, I confess, the first installment of Let There Be Light did not end leaving expectations of a sequel! However, I have found a simpler way to convert old illumination to fibre optics. It’s one that I felt was worth passing along. While cruising eBay I came across a Zeiss fibre optic to Axiomat adapter. No lamphousing just a “plug and play” adapter? In short order I cobbled together a prototype, using junk from my spare parts drawer only one after “Zenifying” my work area). It worked just fine but not exactly an off-the-shelf conversion, ergo I explored the local hardware store; one of the joys of being retired! Per usual, I zeroed in on the plumbing section and lucked out. I purchased and left with the perfect fitting for my Zeiss 60 watt lamp house/Schott-Fostec fibre cable.
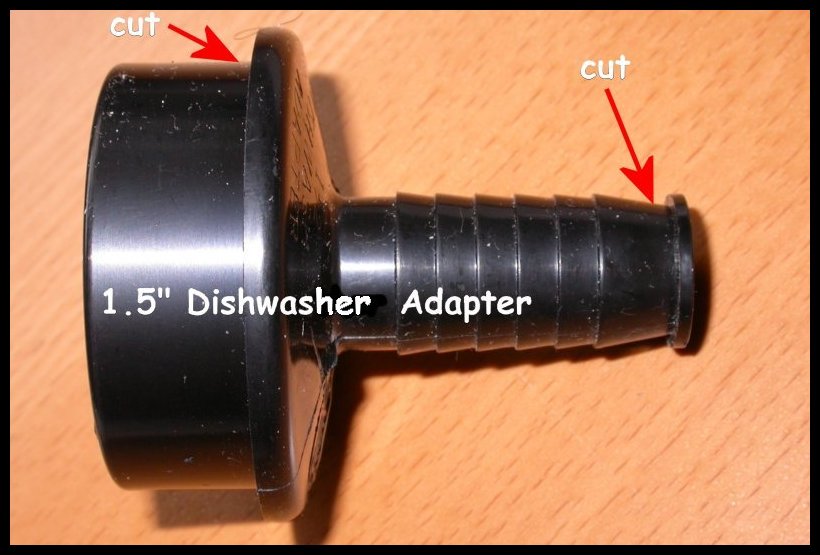
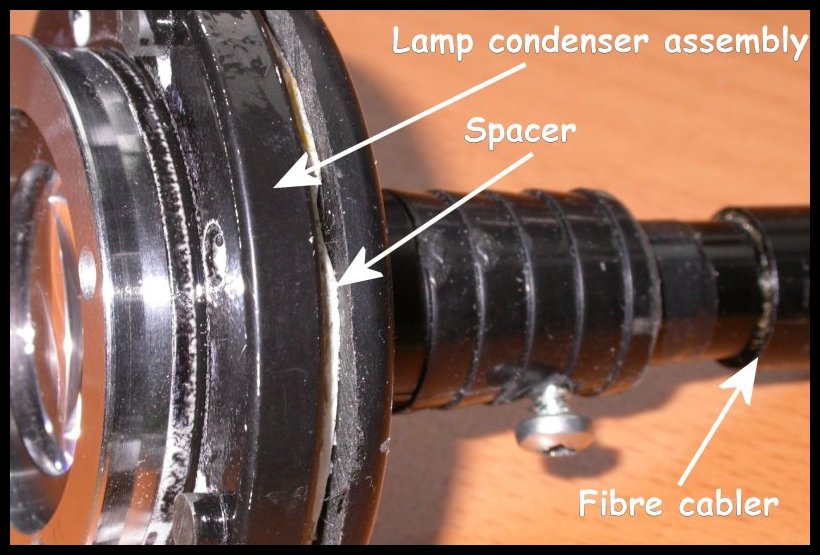
The fitting is a PVC device your local plumber might call a “dishwasher adapter”, and should cost no more then a couple of dollars. The conversion should be relatively straight forward for most lighting systems designed for Köhler illumination. First, you need to remove the lamp condenser lens assembly (lens and frame). This assembly is then remounted to the fitting after making the cuts shown in the Figure 1. As Figure 2 illustrates, a spacer of some sort may be needed (my lamp condenser, or “collector lens”, is mounted in a circular frame, the rim of which protrudes about 2 mm; hence the need for a 2 mm spacer). I hate to admit this, but in this version the three components are held together by carpet tape (amazingly it’s very sticky on both sides and has a million uses).
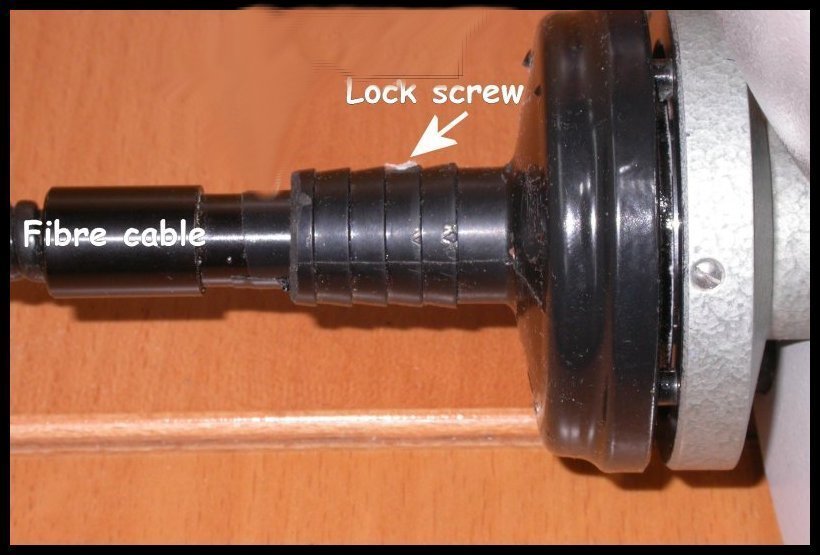
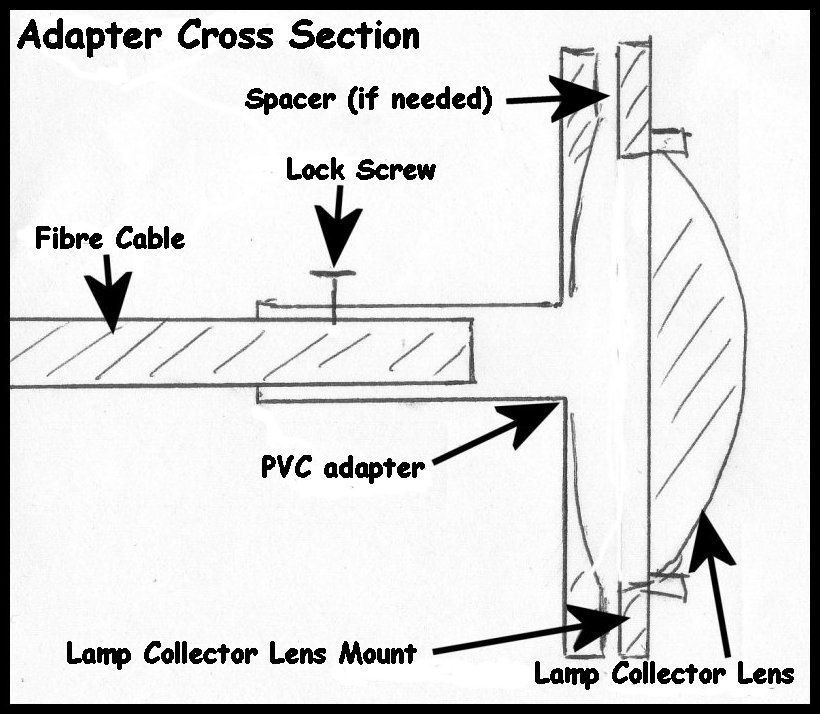
Figure 3 shows the completed device coupled to my Zeiss PM2. I will, likely, have an adapter machined at some point; not an essential step, but one that would bring the coupler assembly more in line with the “look” of the PM2. Figure 4 is a cross-section drawing illustrating the relative positions of the collector lens assembly and fibre cable, within the PVC adapter. You achieve Köhler illumination in exactly the same manner as the earlier, bulb assembly adapter, by sliding the ferrule in and out. As the picture illustrates, the cable ferrule can be secured in position by means of a coarsely-threaded wood screw with the tip ground flat to avoid marking the cable finish.
In Conclusion
This solution affords an easy way to develop the right configuration for your system, without the cost and trouble of experimental machine work. Although, the “plumber’s special” does the job perfectly; I will, as noted earlier, have an adapter machined as a more permanent solution. Please send inquiries via the comments field below.
Comments
add comment