Three Tips for Improving Image Quality Using the SEM
Much of our Scanning Electron Microscopy course at Hooke College of Applied Sciences, a member of The McCrone Group, is geared towards fundamentals including some basics of sample preparation, alignment and operation of the SEM, and taking photomicrographs that are properly focused with astigmatism corrected. One of the primary goals of the course is for each student to be able to independently recognize and take corrective action towards improving the image quality. After the sample preparation and alignment are complete, the goal is often to obtain a high quality image. Getting high quality photomicrographs using an SEM requires a deeper look into adjustments beyond alignment, focus, and astigmatism.
Attend an online course in Scanning Electron Microscopy offered by Hooke College of Applied Sciences, a member of The McCrone Group.
Contrast is Fundamental
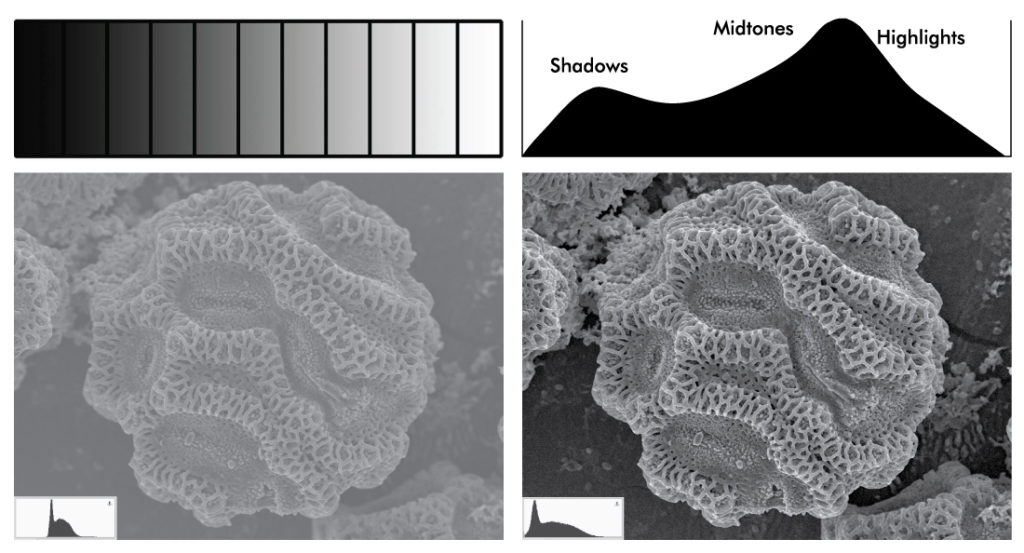
With photography of any kind it is important to utilize the full range of contrast from black to white. At either of these extremes one cannot see any detail, which means that all of the detail is available between them (grayscale shades 1-254 in a single channel, 256 grayscale shade black and white image where 0 = black and 255 = white). Famous photographers such as Ansel Adams have discussed this in terms of zones, but the key is that the full range of contrast is utilized and most of the photo is represented in the middle range. Ideally, an image utilizing the full range of contrast would have a histogram with a minimum of pixels at black and white, and the bulk of the signal represented in the middle (shadows, midtones, and highlights). Usually, the automatic brightness and contrast (ABC) button will get you close, but not necessarily properly saturated. A histogram feature on many scanning electron microscopes (SEMs) allows you to preview the dynamic range of your micrograph, and many SEMs otherwise offer an underutilized line scan feature to preview the full range of contrast in your image during a slow scan (Figure 1). Properly adjusted images have greater aesthetic appeal. Additionally, an image with greater range of gray can be utilized by image analysis software to a much greater extent than an image with only a small range of gray.

Orientation Matters
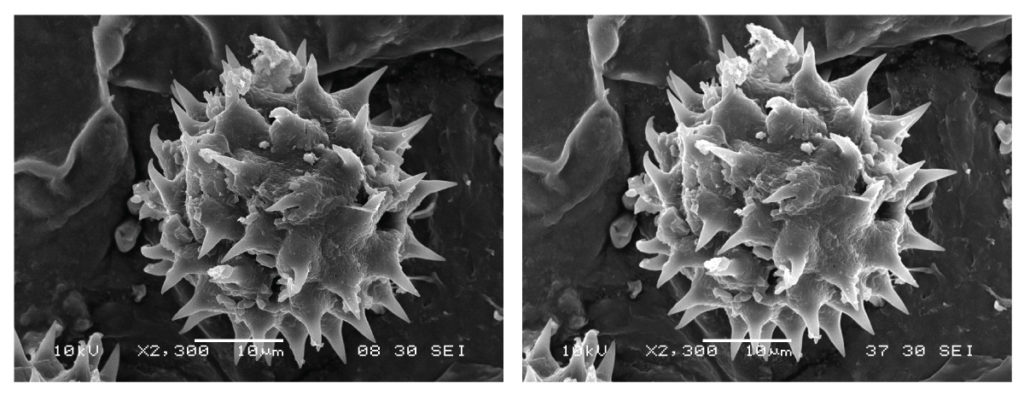
Most SEM systems offer some form of either stage or image rotation, and the orientation of the sample within the frame is important. It is helpful to first visualize the photo and then to use the available orientation tools to adjust the proportions of positive and negative space in the final image. By adjusting the orientation of the subject within the field of view you can increase the available magnification and optimize the use of space (Figure 2). Likewise, with samples such as polished metal cross sections, you can ensure that micrographs share the same orientation and a variety of samples are presented with consistency.

Depth of Field and Focal Point are Critical
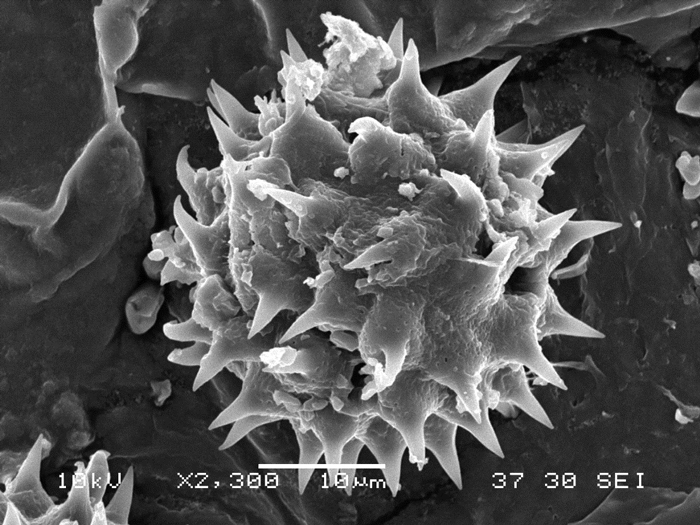
This is analogous to the difference between photographs of a landscape and a portrait. A landscape has every detail in view (focused to infinity) with a large depth of field, whereas a portrait is focused on a specific subject (short focal point) and has a much shallower depth of field. This is why the background of a portrait is often blurry, but is in focus in a landscape. In a camera capable of manual operation, depth of field can be increased by choosing the largest available f-stop (smallest aperture) which increases the focal range, thus ensuring that distant points within the landscape are in sharp focus. Similarly, smaller apertures and longer working distances both increase depth of field in the SEM.
In general you can increase the depth of field in an image by:
- Increasing working distance (Figure 3);
- Reducing the size of the objective lens aperture (Figure 4); or
- A combination of both (Figure 5).


There are clear tradeoffs when you make these changes, as you lose signal when smaller objective lens apertures are used or as you increase the working distance. These may require a much longer exposure time (slower scan speed). Likewise, you might be able to increase the spot size or operating voltage (kV) to compensate. In many cases, when a large depth of field is required, it is at a lower magnification where the effects are minimized. The objective lens aperture or working distance can also be adjusted to make the regions outside of the immediate subject appear slightly blurry, as you might see in a portrait. This can help enhance the image composition by keeping focus within a specific region of interest.
Comments
add comment