7 Essential Steps to Ensure Best Results from Your Polarized Light Microscope (PLM)
Your microscope set-up greatly impacts the accuracy of your observations. No single step can guarantee success, but putting them all together makes the difference between marginal and great results.
- Avoid losing your area of interest when rotating the stage.
- Focus on a particle of interest with the 40X objective in the non-centerable nosepiece position.
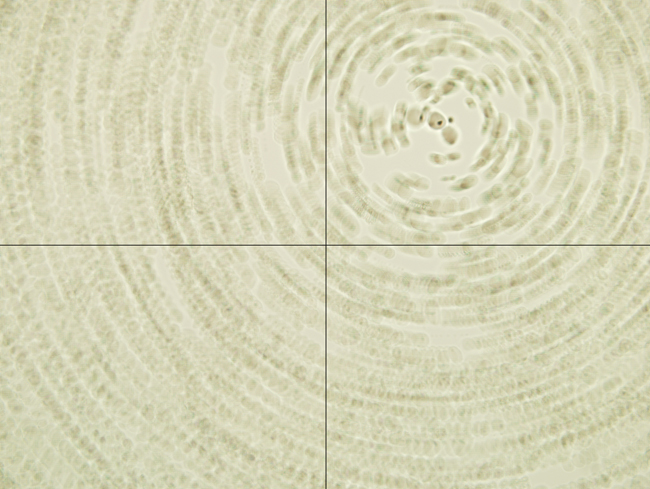
- Moving the slide with your fingers, center a tiny, distinct particle under the crosshairs.
- Rotate the stage, and note whether the particle remains centered upon rotation; it likely will not (Figure 1).
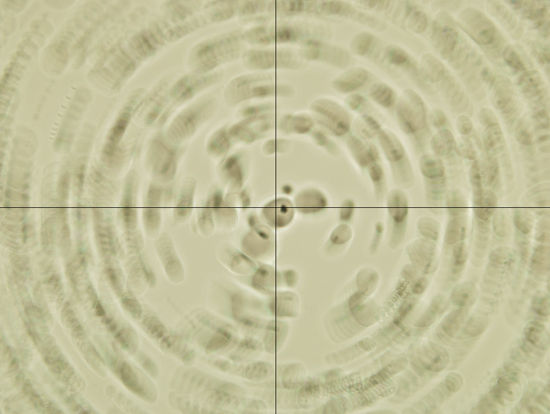
- Using the stage centering screws—not by moving the slide—make adjustments until the selected particle remains centered in the crosshairs when the stage is rotated (Figure 2).
- When the selected particle remains under the crosshairs upon full rotation, the stage is centered (Figure 3).

- Check for Köhler-like illumination. For maximum intensity of evenly-distributed illumination, check whether the imaging and illumination paths are properly set up.
- Imaging path: with a sample in focus, close the field diaphragm.
- Adjust the substage condenser height by using the condenser focusing knob until the edges of the closed field diaphragm are in sharp focus in the plane of the specimen.
- Using the substage condenser centering screws, center the image of the field diaphragm in the field of view (Figure 4).
- Open the field diaphragm until the edges of the diaphragm are just outside of the field of view.
- Illumination path: most modern microscopes have a ground glass disc in the illumination path to help ensure even illumination.
- With the Bertand lens in, or with the eyepiece removed and looking down the microscope tube, close the aperture diaphragm until its image is about 15%–20% closed in the objective back focal plane when using achromatic objectives (more highly-corrected objectives, such as fluorites or apochromats, have higher, more usable numerical aperture, and so the aperture diaphragm may be opened farther).
- Your sample will then be evenly illuminated and free of shadows and hot spots.
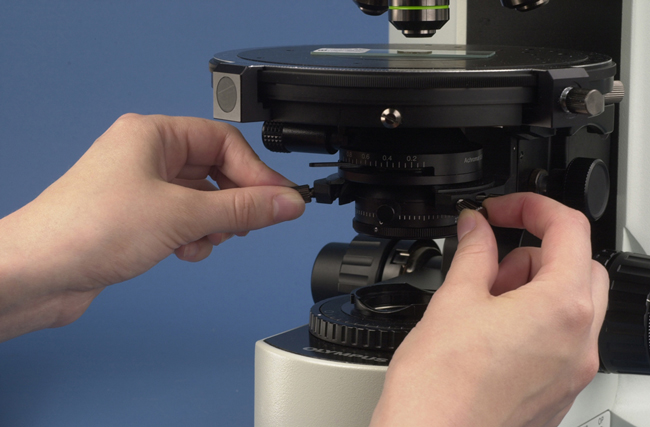
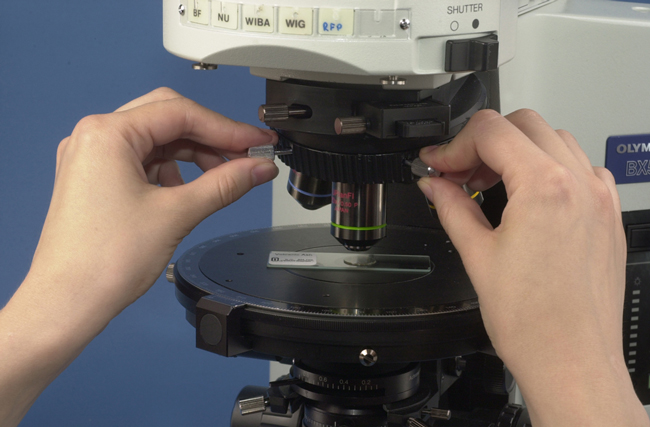
- Center your other objectives.
After your stage has been centered for the 40X objective, and the imaging and illumination paths have been properly set up, make adjustments to the other objectives, but this time by using the centering wrenches (Figure 6) in the nosepiece—not the stage centering screws— until the selected particle remains centered under the crosshairs when rotating the stage. The now-centered field diaphragm will aid the alignment of the lower-magnification objectives, because it will be seen in the field of view.
BONUS TIP: Use a distinct particle that is not in an area of the slide that is too populated to avoid losing your target while centering the stage and objectives.
- Adjust the aperture diaphragm to achieve the best balance of depth of field, contrast, and resolution.
- The aperture diaphragm controls the numerical aperture (N.A.) of the substage condenser; which, in turn, determines the working N.A. of your objective. Keep in mind the N.A. of your objective is fixed (unless it has a built-in iris diaphragm).
- If the cone of light from the substage condenser (which is controlled by the setting of the aperture diaphragm) is greater than the N.A. of the objective, light both fills and spills over the objective lens which provides maximum resolution, but depth of field and contrast are decreased.
- If the cone of light from the substage condenser is of a smaller angle than the N.A. of the objective, resolution will be decreased, and depth of field and contrast increased.
- Maintain proper field and aperture diaphragm settings relative to the numerical aperture of the objective.
BEST PRACTICE: When looking at mixtures, it is good practice to constantly adjust the aperture diaphragm to optimize for the different optical characteristics in the sample. Keep in mind glare and fringes can all be controlled by balancing resolution, depth of field, and contrast.
The field diaphragm is opened wider when using lower magnification and closed smaller when using higher magnification, and the aperture diaphragm is opened wider when using higher numerical aperture objectives, and closed smaller when using lower numerical aperture objectives.
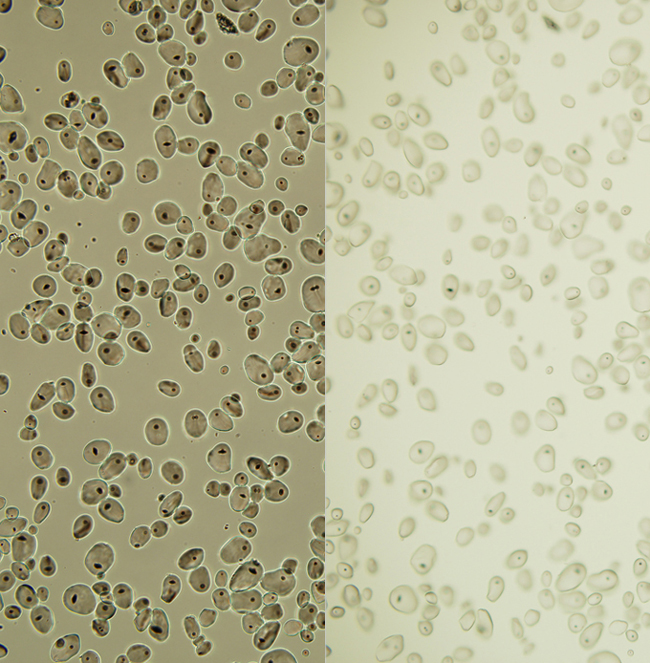
RIGHT: When the aperture diaphragm is opened, the resolution of the image will increase, but the depth of field and contrast will decrease.
- Maintain color temperature to achieve correct color rendering, interpretation of unknowns under standard conditions, and photomicrography.


- Maintain comfortable light intensity through the use of neutral density filters.
- Analysis must be done with proper and constant voltage. The rheostat regulates the voltage that changes the amount of current going to the light bulb—the higher the current, the cooler (bluer) the color temperature.
- It is important to maintain color temperature by leaving the rheostat at a constant voltage setting, together with the correct shade of blue filter, to achieve daylight viewing conditions. If the light intensity is too high, add neutral density filters.

- Microscopical measurements are expressed in micrometers (µm), and are made using a calibrated eyepiece micrometer. The divisions on the eyepiece micrometer are at even intervals, but need to be calibrated against a reference scale (a stage micrometer with a scale of known length, e.g., 1 mm graduated into 100 divisions).
- Place the stage micrometer on the stage.
- Sliding the stage micrometer with your fingers, align the zero line of the stage micrometer with the zero line of the eyepiece micrometer.
- Determine the value that each division in your eyepiece micrometer represents.
- You will need to repeat these calibration steps for each objective.
Having a checklist in front of you will make it easy to include important considerations for proper microscope use.
Comments
Kirsten Moffitt
This is excellent! Many thanks!
add comment