Electronic Flash System for a Microscope
Introduction
A few years ago I put together an electronic flash system for microscope imaging. The system was built around a Canon T90 film camera and its companion flash, the TTL300. I have since switched to a Coolpix 4500 digital camera and as a result the “black box” that formed the basis of the Canon system was stored away and forgotten. I had resigned myself to life without flash assuming that flash based digital photomicrography, with consumer level cameras, would be either impossible, or if possible, exceedingly tedious. As it turns out I was wrong on both counts; it is clearly both possible and convenient. Using a flash is easier and faster than conventional lighting.
I began looking at design options soon after coming across some outstanding images produced by Charles Krebs using a digital camera and electronic flash. Inspired by Charlie, I dusted off the black box and revisited the Canon design in the hope of mating a flash with the Coolpix 4500. Another microscopist, Mike Andre, pointed the way to an ideal flash for Coolpix photomicrography, the Nikon SB-24. The SB-24 is controlled by the Coolpix when the two are linked together with a Nikon multi-flash sync cord (either the SC-18 or SC-19). In addition, as the flash is made by Nikon, the trigger voltage will not damage the camera. Of special value is the SB-24’s digitally variable output; flash duration can be adjusted from 1/1000 of a second to 1/11,000 second. (The Nikon SB-28 may be an even better option as the output of that flash can be varied down to 1/64th – which equates to burst duration of around 1/28,000 second – almost fast enough to stop a bullet!) The Coolpix flash system has been completed and it works better than anticipated. This article explains how the system is configured and operated. Although it is based on a Coolpix camera the concepts outlined here should be of universal application.
Compound Microscope (transmitted light)
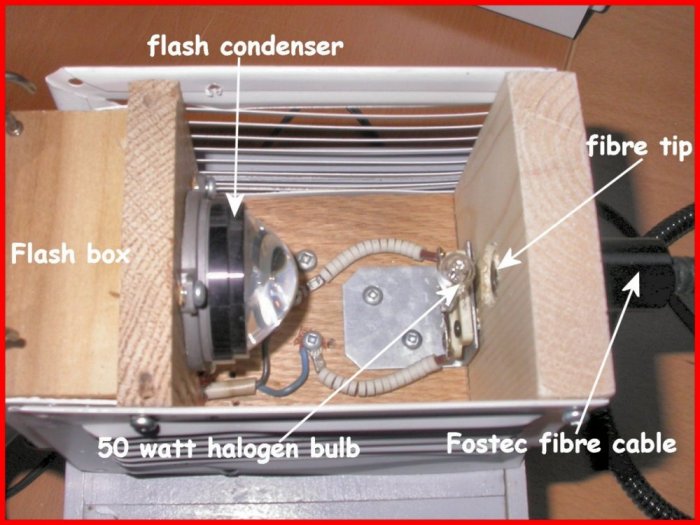
The flash head consists of a flash tube and Fresnel lens. To strictly satisfy the requirements of Köhler illumination the flash tube should be imaged in the back focal plane of the objective. In reality this is not possible. However, based on the images produced so far, I feel that locating the flash or more specifically the Fresnel lens within a few inches of the Köhler aligned bulb filament is fine. In my case this was not too difficult to achieve as my Photomicroscope has been converted to fibre optic illumination (see “Let there be Light”). Consequently a fibre optic cable, connected to a fibre optic illuminator, conveys light into the optical path of the Photomicroscope. This allowed me to use a linear pathway for the flash, specifically: flash – flash collector lens – 50 or 100 watt halogen bulb – fibre optic input tip – fibre optic output tip – lamp collector – microscope. This is the design I am now using.
The linear arrangement is by no means the only option for a good flash system. Two other approaches are being used by others and the results are first rate. The first entails the use of a “Y” shaped or dual fibre optic cable, arranged in reverse, such that the input tip becomes the output tip. The flash fires into one of the “Y” cords, the illuminator is connected to the other and the tail (output tip) of the cable is positioned inside the lamphouse (replacing the bulb assembly). The second approach incorporates a beam splitter above the light port; a piece of clear glass, such as a microscope slide, set at a 45 degree angle would work well. The flash head is positioned so that the flash pulse reflects off the glass into the condenser.
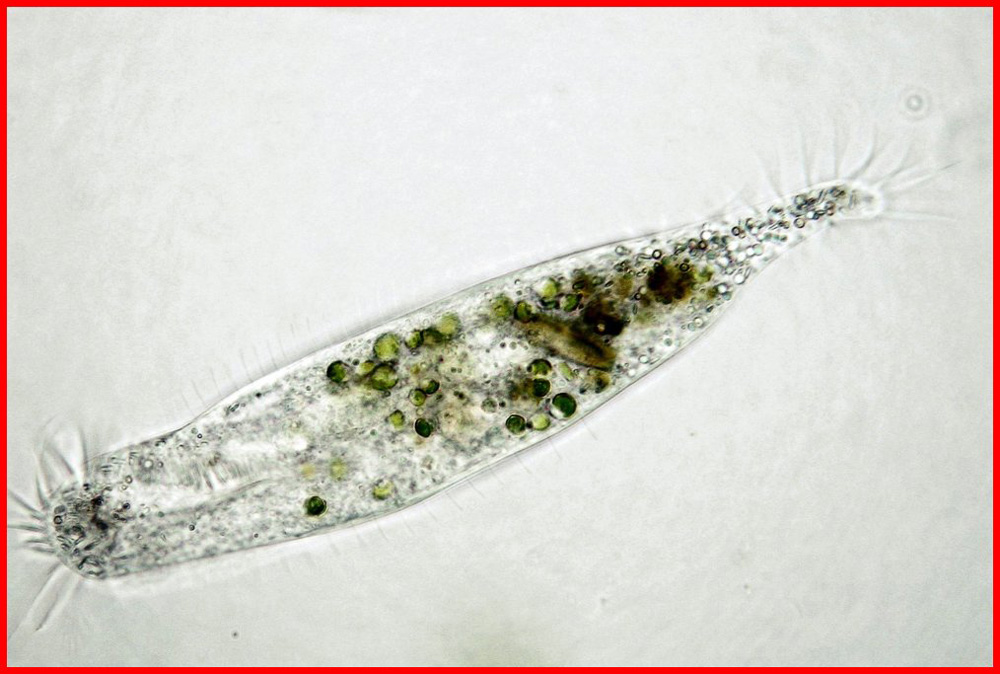
I have uploaded pictures of my system (Figures 1-3) and some images made with it (Figures 4-6). In addition to the flash “integration box” (Figure 2) and the step-down transformer there is a rheostat to control the intensity of the halogen bulb. The rheostat is located between the mains and the transformer. I employed a wire-wound model, however a digital version should work fine (such as those made for the remote dimming of table lamps). The ability to control lamp intensity reduces heating and keeps illumination intensity at a level adequate for composing the shot without contributing to image formation. The flash condenser lens was scavenged from a slide projector. Although this collector effectively concentrates the flash pulse into a relatively compact spot over the tip of the fibre cable, I suspect it may not be essential. Nevertheless maximizing flash efficiency in this way helps ensure that the pulse duration remains at or near 1/11,000 second.

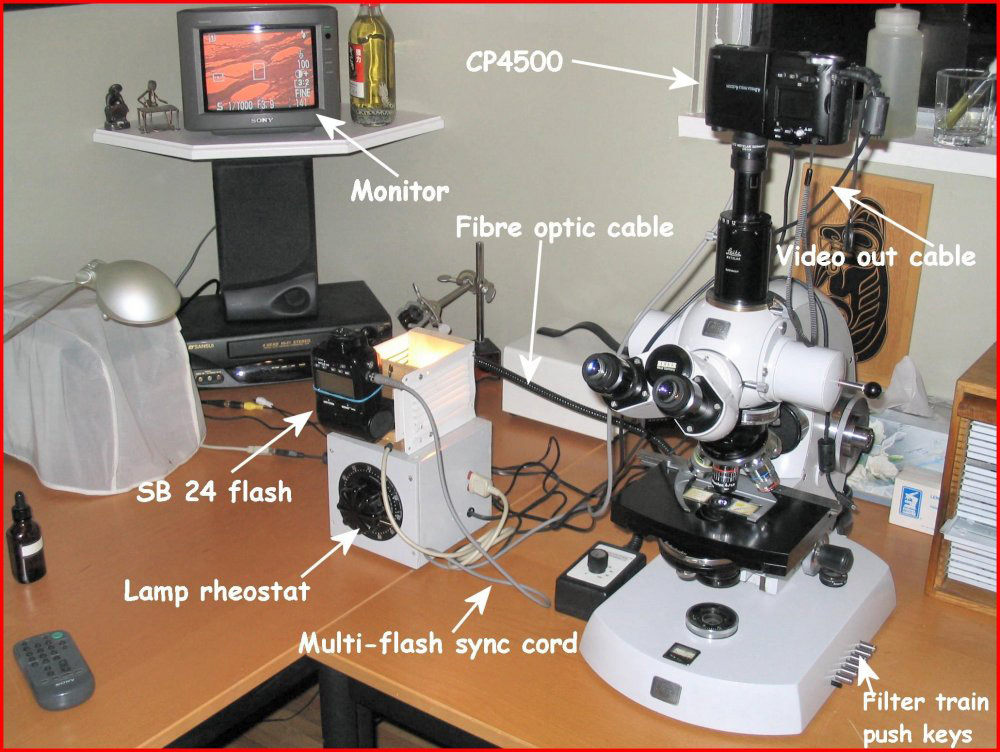


With my system, flash intensity in the specimen plane is so high that I must use neutral density filters to prevent over exposure (ISO 100) in both brightfield, and phase contrast. In my case this is relatively simple as the Photomicroscope has a pop-in filter train with four ND filters of different densities. The filters can be inserted separately or in combination via steel push keys. On the other hand placing an appropriate ND filter in a filter tray should not be too inconvenient. In all likelihood only two ND filters will be needed. Setting the correct exposure has turned out to be surprisingly easy, primarily due to the “instant image” characteristics of digital photography. All one need do is shoot a few test frames to determine the correct flash setting for a given objective and subject.
Stereomicroscope (reflected light)
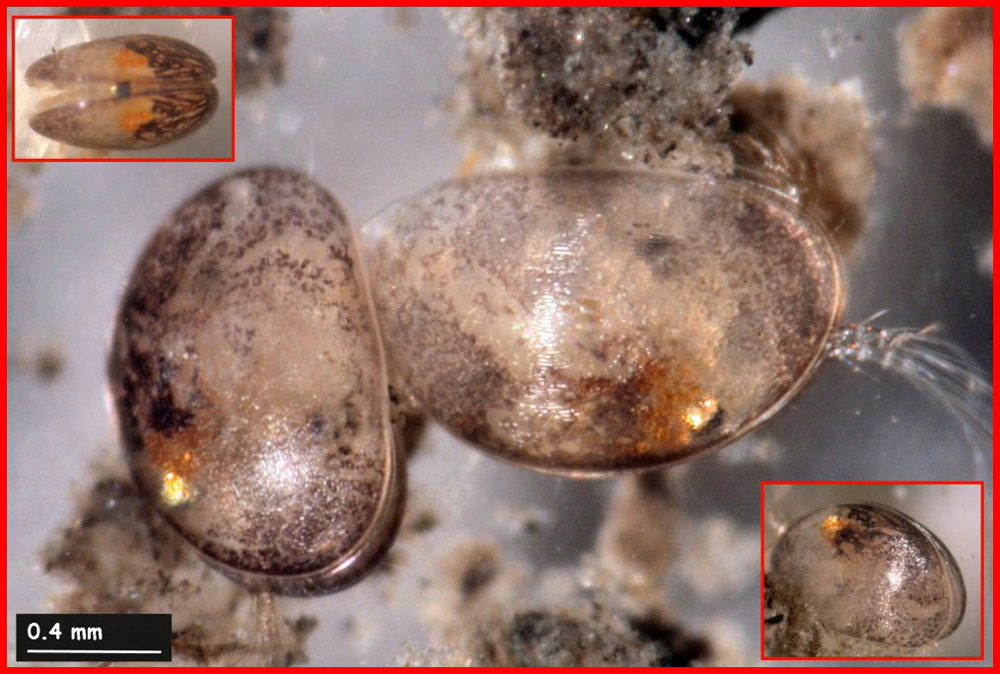
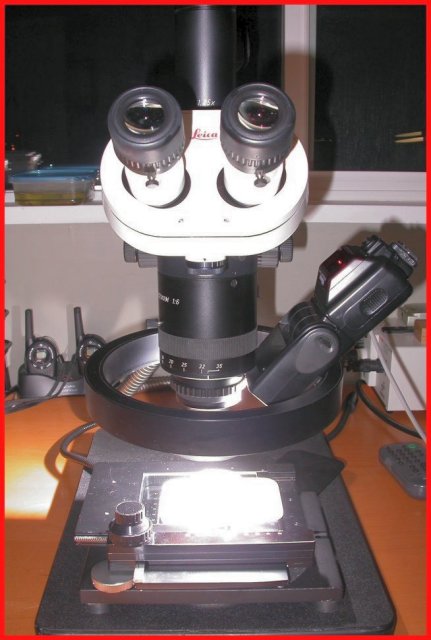
My Leica Macroscope (single objective; not a true stereo) is equipped with a large diameter ringlight for reflected light. Although I can run the flash through the ringlight I have found direct flash to be more effective in most cases. By direct flash I mean pointing the flash head at the subject and taking a picture–exactly like normal flash photography. Most stereomicroscopes have a very long working distance (for the M420 this is 4 inches) so the flash pulse can be set to strike the subject at just about any angle short of near vertical. With an angle of 45 degrees or so unwanted reflections are minimized while surface topography is emphasized (Figure 7). The picture of the M420 and large ringlight illustrates the rather lazy but effective way I position the flash for macro work (Figure 8). If this option had not been available I would have fabricated a flash bracket to achieve the necessary angle. Reflected light flash for a stereomicroscope is easier to arrange than a transmitted light system. Consequently it might be a good place to start your experiments with flash.
Camera
The Coolpix internal settings are adjusted to flash sync and the white balance is set for flash. I also use manual focus set to infinity. The camera does take a moment to find the sweet spot but that is generally not a problem as focus can be locked by pressing the button part way down. The Coolpix beeps when focus is achieved. This is a nice feature if you shot while viewing through the eyepieces (the best way to capture images of fast-moving critters). Finally, the raw flash image may have a greenish tinge but not too worry, as Tom Webster pointed out this can be corrected with a magenta filter (the filter can be made with a bubble jet and transparencies, or by cutting it out of a translucent “red” acetate file folder).
Parting Thoughts
Flash microimaging is proving to be a fantastic way to capture just about every type of image. The SB-24, especially at low power, recharges very quickly allowing one to take a series of pictures only a few seconds apart – each perfectly exposed. My only regret is not going down this road earlier!
If you have any questions please drop me a line and I will do my best to answer them.
Comments
add comment