Microscope Activities, 7: The Substage Condenser
In the past, Hooke College of Applied Sciences offered a microscopy workshop for middle school and high school science teachers. We thought that these basic microscope techniques would be of interest not only for science teachers, but also for homeschoolers and amateur microscopists. The activities were originally designed for a Boreal/Motic monocular microscope, but the Discussion and Task sections are transferable to most microscopes. You may complete these 36 activities in consecutive order as presented in the original classroom workshop, or skip around to those you find interesting or helpful. We hope you will find these online microscope activities valuable.
EXPERIMENT 7: The Substage Condenser Assembly
Goal
To learn the optical characteristics, function, and use of the substage condenser assembly.
Level
Basic
Materials Needed
None
Procedure
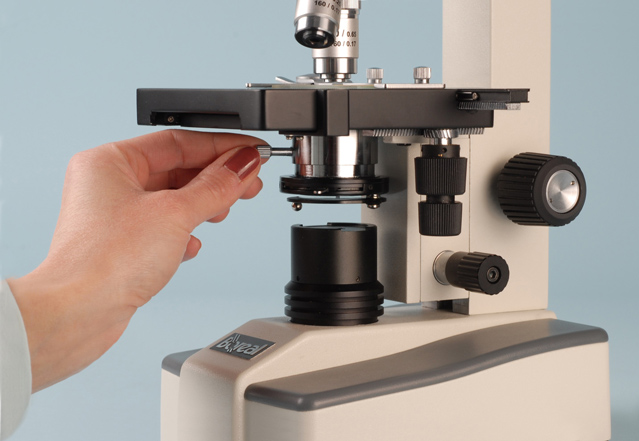
With the microscope light OFF, and with no specimen on the stage, rotate the nosepiece so that it is between objective positions; that is, so as to provide an unobstructed view down through the stage opening. Locate beneath the stage the lever with knurled knob that controls the substage condenser focus (Figure 7-1). Notice that rotating this lever throughout its inclined groove makes the substage condenser move up and down.
While operating this substage condenser focus lever, look down through the opening in the stage until you can read the letters and numbers engraved on the top of the substage condenser (Figure 7-2).
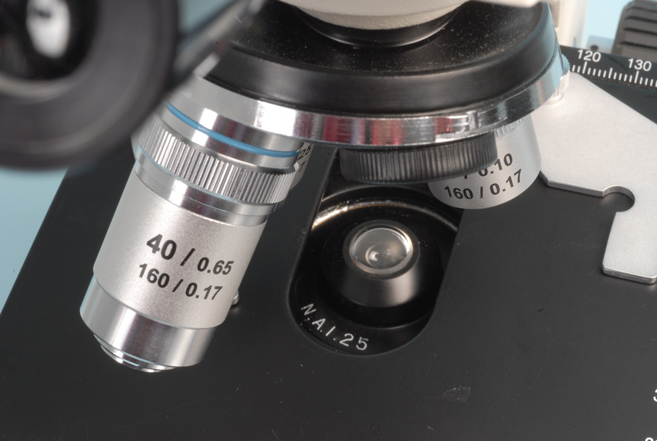
The legend, engraved in white, reads: N.A. 1.25; this tells us that the substage condenser has a Numerical Aperture of 1.25.
Next, place a prepared specimen on the stage in such a manner that the edge of the slide covers the rear half of the condenser top lens (Figure 7-3)
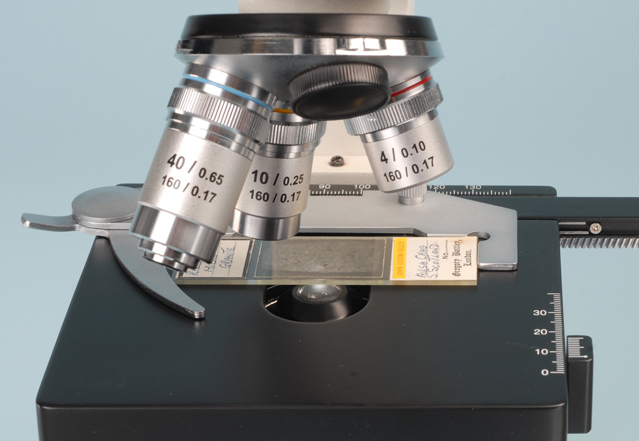
Carefully rack the substage condenser all the way up until it stops, noting how close the top of the condenser gets to the bottom of the slide. Notice in Figure 7-3 that at the very top of its travel, the top lens of the substage condenser is very close to, but does not come into contact with the slide; this is good, and where it should be. If, or whenever, the top lens of the substage condenser contacts the bottom of the slide, or actually raises the slide, the substage travel limit needs to be readjusted. This may be done by adjusting the travel limiting screw that is usually located either suspended from the bottom of the stage, or on the top of the condenser carrier. [A similar limit-of-travel screw may be provided for the stage to prevent its being driven into the objective].
With a conventional microscope light source, a field diaphragm (or lamp diaphragm) will be provided, in which case the field diaphragm will be focused in the field of view by adjusting the height of the substage condenser. You do not have a field diaphragm on your Boreal/Motic microscope, because you have a small LED light source. What you will do, therefore, is adjust the height of the substage condenser, while looking at your field of view, until your specimen field is evenly illuminated.
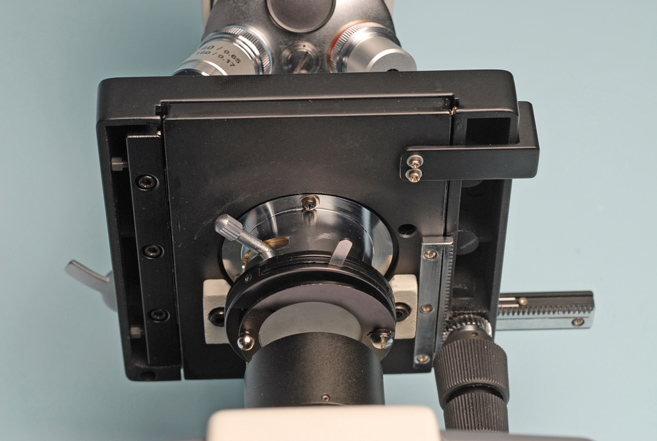
Now direct your attention to the bottom of the substage condenser, and locate the flat handle that opens and closes the aperture diaphragm (Figure 7-4).
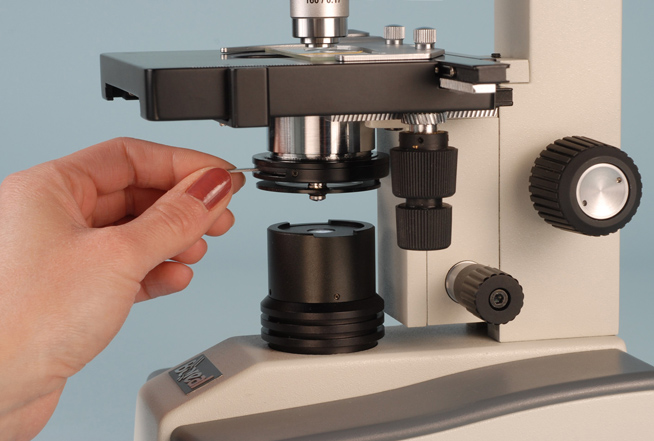
Notice also that there are two ground glass discs at the bottom of the condenser; one is fixed, and the other is fixed into the swing-out filter carrier (Figure 7-5). This arrangement is not seen on other microscopes, and is necessary here to effectively increase the size of the LED light source.
Discussion
The numerical aperture is a measure of the angular light-gathering ability of an objective, or the measure of the angular light-providing ability of a substage condenser. The numerical aperture is related to the resolving power of the microscope system: the higher the numerical aperture, the higher the resolving power, other things being equal. The operating principle of the substage condenser is that its numerical aperture must be equal to or greater than the numerical aperture of the objective in use. The numerical aperture of your objectives are 0.10 (4X), 0.25 (10X), and 0.65 (4X). Since the numerical aperture of your substage condenser is 1.25, it is generally much greater than your objective, and is, therefore, suitable for use with all of them. In fact, since the N. A. of the substage condenser is greater than 1.00, it means it is actually suitable for use with oil immersion objectives; the substage condenser top lens making oil contact with the bottom of the slide preparation, while the objective is brought into oil contact with the coverglass (Experiment 32).
The aperture diaphragm is probably the single most important adjustment on the microscope, in that it controls the numerical aperture of the substage condenser, which, in turn, controls the numerical aperture of the objectives, and, therefore, controls the resolving power of the entire system. With your achromatic objective, the aperture diaphragm lever should be readjusted every time you change objective magnification, such that the leaves of the aperture diaphragm can just be seen to come in about a quarter of the way at the objective back focal plane! That’s why we advocate having a removable eyepiece, or examine the eyepoint with a magnifier. Alternatively, you may wish to adjust the aperture diaphragm lever while critically evaluating the quality of the observed image.
- Closing the aperture diaphragm increases contrast and increases depth of field, but reduces resolution.
- Opening the aperture diaphragm increases resolution, but decreases contrast and decreases depth of field. The object is to strike a balance between resolution, contrast, and depth of field, while critically evaluating the quality of the final image.
Beginners tend to close the aperture diaphragm too much. Your hand should be on the aperture diaphragm lever constantly, making small adjustments as you look at different areas of interest in your specimen.
In a conventional microscope, the substage condenser can be easily removed for cleaning, and for unscrewing the top portion of the condenser to obtain lower numerical aperture. The way the Boreal/Motic microscope is configured, you cannot remove the substage condenser.
To achieve maximum resolving power, the opening of the aperture diaphragm needs to be fully and evenly illuminated with light. The LED that serves as the light source for your microscope does not allow this because of its small size. The ground glass discs have been placed into the system to scatter the light from the small light source so that it behaves like a large light source; the designers felt that two ground glass discs were necessary to do this. They each reduce the amount of light by a great deal, so try to use just one ground glass, if possible, to obtain even illumination. It is too bad that the lower ground glass has been fixed permanently into the filter carrier, as it makes other work more difficult—we will deal with this in Experiment 16 on darkfield, and Experiment 17 on Rheinberg illumination.
Not all student microscopes are equipped with a substage condenser assembly that is focusable, and that has an adjustable aperture iris diaphragm (Figure 7-4).
If your microscope has a fixed lens permanently mounted in the stage and/or if it has a metal or plastic wheel with different size holes. See Experiment 26, The Aperture Wheel.
Comments
add comment