Confessions of a Light Microscopist: The Object Space Explorer
The Confessions of a Light Microscopist articles feature individuals who take their microscopy craft to the highest possible level, laboring over the smallest details. This confession comes from a person, whom we will call the Object Space Explorer, who spends a lot of time thinking about an often-overlooked part of the microscope called the object space.
The Confession: “When making a microscopical preparation for particle identification work, I use cover glasses that I have pre-measured to be exactly 0.17 mm in thickness, cleaned with concentrated HCl, and stored in alcohol. I then flame them to burn the alcohol off before use. I do the same cleaning process for my slides.”
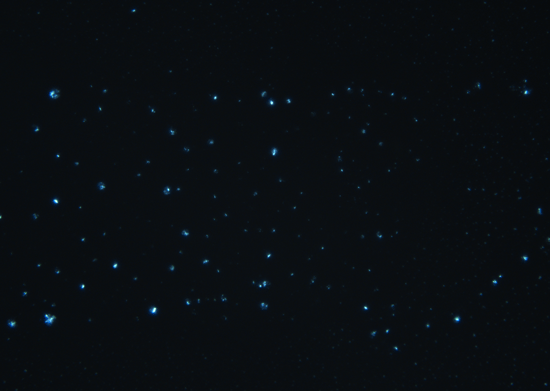
I understand why someone would go through the trouble of cleaning their microscope slides and cover glasses before making a microscopical preparation, the photomicrograph below illustrates why, but how does measuring the thickness of each cover glass figure into our overall analysis when it comes to particle identification?

Well, it has to do with creating the optimum slide preparation for your analysis. Each time you make a microscopical slide preparation, you are setting up what is called the object space.
Assuming that you are starting with a clean slide and cover glass, the object space is composed of four things:
- the specimen,
- the mounting medium,
- the cover glass, and
- the space between the top of the cover glass and the front of the objective.
Not paying attention to object space can make or break your analysis. Let’s find out why.
Getting Lost in Object Space
I’m sure this has happened to you during one of your microscopy sessions: You are looking at a sample using the 40X objective (400X total magnification) and you can’t quite make out a structure, so you rotate in your 100X objective (1000X total magnification) to get a closer look, but instead of getting a closer look, you can’t find the object, or perhaps you can see the object, but your microscope’s available free working distance will not allow you to achieve best focus—getting you so close, yet so far away.
What’s happened, is that the object space you created, which again, is made-up of the specimen, mounting medium, cover glass, and the space between the top of the cover glass and the front of the objective, is too large—the 100X objective cannot physically fit into the object space, and/or the depth of field is insufficient, rendering your 100X objective useless for this analysis.
When you find yourself in such a predicament, there are a couple of things you can do—either make a new, thinner preparation using a cover glass of known thickness, or use an objective with more free working distance. The free working distance is the space between the front of the objective and the top of the cover glass.
Objective Parts Unknown
To get started on my exploration of the object space, the Object Space Explorer directed me to first read several publications and a couple of industry standards about microscope cover glass thickness. While reading the ISO 8255-1:2017, I had my a-ha moment. Under the General heading of the standard, you’ll find this quote:
“All media that are located between the specimen and the microscope objective are in their optical effect part of the objective.”
Such media include the mounting medium, cover glasses, and/or any immersion medium (i.e., oil, water glycerin, etc.). In other words, the last functioning part of your microscope’s objective is essentially what is lying on your microscope slide. You, the microscopist, finish the last functioning bit of the objective every time you prepare a specimen. I don’t think most people realize this.
Provisions
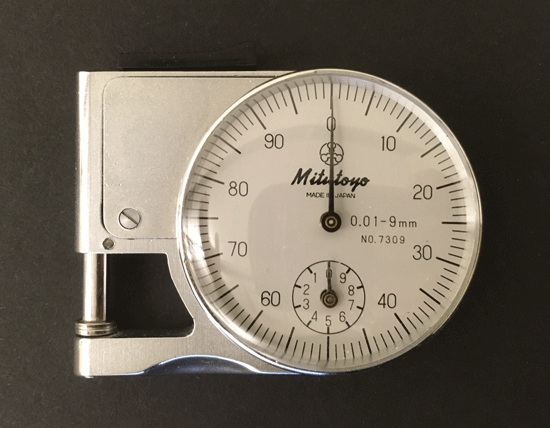
After becoming familiar with the literature, the Object Space Explorer said my first order of business was ensuring that I had a supply of clean and measured cover glasses, and then handed me a machinist’s micrometer.
He said, “The quality and thickness of the cover glass are controllable factors of great importance for achieving the best image. For best results in microscopical observations and photomicrography, cover glasses should be scrupulously clean and within the thickness range of 0.160 mm and 0.190 mm (No. 1 ½).”
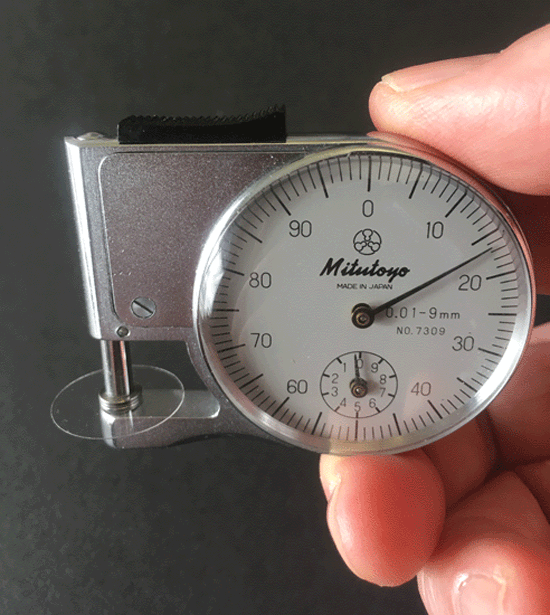
I started with an ounce of No. 1½ cover glasses, manufactured by Thermo Scientific, each with an 18 mm diameter. After cleaning the cover glasses, I measured their thickness using the machinist’s micrometer.


The Explorer recommended that I clean the measuring faces of the micrometer by wiping them with a piece of notebook paper between each measurement. This is done by gently closing the measuring faces of the micrometer on a piece of notebook paper and then dragging the micrometer toward you.

I fully expected after having read the literature that my cover glasses probably weren’t all going to be what was reported on the box. The one-ounce box contained a total of 249 cover glasses. As you can see in the chart below, most of the cover glasses measured 0.165 mm. thick, a bit less than optimum, while only 58 met the desired thickness, and just a handful were a bit thicker than 0.17 mm. I thought this was pretty good, they all fell into the acceptable range of 0.160 mm – 0.190 mm.

From my readings, I knew that constructing the optimum slide preparations would be a bit more involved, especially for high magnification work. The literature states that it is considered best practice to mount the specimen to the underside of a pre-measured cover glass. This seemed to be not very practical for general particle identification work. So, I asked the Explorer for his take on this, and he said, “The objective sees everything in the object space, the cover glass, the mounting medium, the specimen itself, and the space between the top of the cover glass and the front of the objective. To construct the optimum preparation, you should mount the specimen directly on a measured cover glass, and then to a slide; this reduces the amount of mounting medium in the optical path. This method of sample preparation is common within cytological applications, but is not practical in the field of particle identification. When operating in the object space, it all comes down to two factors: critical sample preparation and choosing the right objectives for your analysis. Knowing what objectives to buy and where to spend your money will keep you in the game, no matter what the specimen throws your way.”
Objective Logic
So, where does one spend their money when buying a set of objectives? I posed this question to the Explorer, and he pulled out a drawer containing two additional microscope nosepieces filled with objectives, some with corrections collars and one with a built-in iris. This guy was serious!
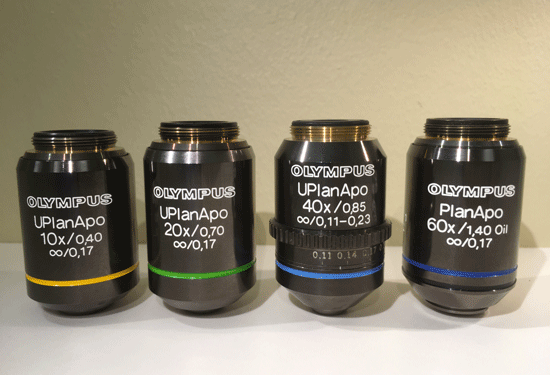
The objectives pictured below were on the Explorer’s microscope. These were his everyday objectives used for particle identification with polarized light—a set of strain-free plan fluorites. He made it clear to me that these objectives were selected nearly twenty years ago and if given the opportunity to select from a new line of modern objectives, his choices would likely be different.

He said, “It should be emphasized that just because one can afford a full set of plan apochromats does not mean you shouldn’t also own plan achromats and plan fluorites. The critical microscopist will need a whole array of objectives, including strain-free achromats, plan fluorites, and plan apochromats. Each has its advantages and disadvantages. In special cases, where you need higher resolution, you should have a set of apochromats, with correction collars if available.”
The Explorer didn’t see the need to purchase high NA apochromats without a correction collar.
Like most decisions in life, there are trade-offs to consider:
- quality (degree of optical correction) and
- practicality (free working distance).
The Explorer said, “You should strive for balance; you always want the highest resolution (highest NA) with the greatest free working distance.”
This kind of balance is what we see with the Explorer’s second nose piece: a complete set of apochromats that stays on the lower side of magnification.

Notice that the 40X and 60X objectives have NAs at or significantly above 0.85. These two objectives would be especially sensitive to cover glass thickness. On the 40x objective, the inscription 0.11–0.23 indicates this objective can handle a cover glass thickness range between 0.11 – 0.23 mm by adjusting its correction collar. The 60X oil apochromat has no correction collar and goes against the Explorer’s advice of purchasing an apochromatic objective without one. When asked, he said, “This objective gives me an uncommon magnification option and because of that, I had to sacrifice the correction collar, which at the time of purchase simply wasn’t available from Olympus at this magnification.”
The Explorer’s third nosepiece was equally as interesting. It held a 4X apochromat for low magnification work, a 20X metallurgical plan fluorite objective used to view uncovered specimens by top light, a 40X long working distance plan fluorite with a correction collar with the ability to handle preparations having 2.6 mm of glass in front of the specimen, used to analyze particles suspended in solutions inside of glass vials or petri dishes.

The highest magnification objective is a 100X plan apochromat with a built-in iris. I was intrigued by this objective, having never used one. I asked the Explorer, “What situations require such a modification?”
He said, “Built-in irises are available for objectives in the 40 – 100X range for use in fluorescence and darkfield microscopy. Objectives should be obtained with irises even if you aren’t thinking of doing fluorescence or darkfield microscopy. The NA, resolving power, and depth of field of the objective can be controlled using the iris.”
I found the Explorer’s logic behind choosing each objective fascinating. Once pointed out, all his choices made perfect sense, but how does one arrive at these decisions?
He told me, “In choosing any objective, you need to ask yourself two questions: Why? and Why not?”
Playing the Game of Why and Why Not?
The game of Why and Why Not starts by asking yourself these two questions, “Why do I need a (fill in the blank) objective?”, followed by “Why not?”
Let’s start with a hypothetical, determining our need for the highest magnification objective.
Question: Why do I need a 100X plan apochromatic objective?
Answer: Because this objective has the highest optical correction and highest NA.
Now ask yourself, “Why Not?”
Answer: Because a 100X plan apochromatic objective has little free working distance and is beyond my budget.
It sounds like maybe a 100X plan fluorite objective will suffice. Let’s ask ourselves the same questions of why and why not.
Question: Why buy the 100X plan fluorite objective?
Answer: Because this objective has a higher optical correction and NA compared to a plan achromat.
Question: Why Not?
Answer: I can’t think of a why not. This objective is in my budget and has more free working distance than the plan apochromatic objective.
Playing the game of Why and Why Not, forces you to reason through your decision. Of course, you don’t have to limit this game to objectives, it can be applied to other aspects of your microscope system, too.
After my visit with the Object Space Explorer, I had a better appreciation for critical sample preparation and the importance of cover glass thickness. I also came away questioning the optics on my own microscope and reflecting on what factors played into my Why and Why not? The Explorer impressed upon me that in the field of particle identification, the microscopist must be prepared to face any type of sample. Having the right gear on your microscope will allow you to conquer the microscopy wilderness like a pro.
References
- Bracey, R.J., The Aberrations of Microscope Objectives and their Variations with Small Departures from Optimum Working Conditions, Journal of the Royal Microscopical Society, October 1952, pages 1-9.
- Spinel, B.M. and Loveland, R.P, Optics of the Object Space, Journal of the Royal Microscopical Society, Vol. 79, pt. 1, April 1960, pages 59-80.
- Gill, G.W., Cytopreparations Principles and Practice, Chapter 17, Cover Glasses. March 2012.
- Delly, J.G. Essentials of Polarized Light Microscopy. 2019.
- Delly, J.G. Microscope Activities, 24: Coverglass Thickness.
Comments
add comment