Exploring the World’s Beaches in the Classroom One Sand Grain at a Time

This being the summer issue of Nanographia, there is a good chance that our readers have already returned from or are making plans to go on vacation. Many of these vacations will probably involve some kind of water activity, such as having fun at the beach. Since most of our planet is covered by water, beaches in one form or another are all around us. Whether it’s the ocean, a bay, a river, or a lake, there will probably be sand at your feet. Sand has been appreciated by collectors of sand, known as arenophiles, scientists, and classroom teachers for decades. As it turns out, the study of sand has many practical applications in the classroom, ranging from K-12 and beyond. This blog post will explore ways to collect and archive sand, and show some activities used by educators to study sand samples.
Getting Started
The sample preparation method described below has been used by teachers and collectors of sands for years. These techniques are fast, easy, and low cost. First, you’ll need a small amount of sand—remember, this is a microscope activity so literally a teaspoon of sand will be enough to generate many samples. You will also need some card stock, transparent tape, and a single-hole punch. For sources of card stock you can use a manila file folder, index cards, or even old business cards.

To secure the sand grains to the card stock you will need a piece of transparent tape. Start by cutting some 1″ x 3″ pieces of card stock, essentially replicating the dimensions of a standard microscope slide. Using the single-hole punch, make a hole in the center of each “slide” and then affix a piece of tape over the hole on one side of the card stock, creating a sticky circle on what will be the top of the slide.
The opening created by the hole punch should be approximately 6 mm in diameter, allowing you to view many individual grains of sand. As illustrated in the image below, you can create more than one opening on the card slides, doubling the storage. Once the tape is adhered to the card stock you can begin depositing the sand grains onto the tape’s adhesive layer. Using a small spatula and sprinkling the sand over the adhesive works well. After the sand is adhered to the tape, you can inspect your work under low magnification. Sometimes the sand grains will need a little help sticking to the adhesive; you can gently push the sand grains into the adhesive with the spatula or some other flat instrument.
It is worth noting that if you pick up a grain of sand and move it from the tape, you may leave a divot in the tape’s adhesive layer that can be seen when viewing under magnification. These divots, or sometimes peaks, can be mistaken for grains of sand.
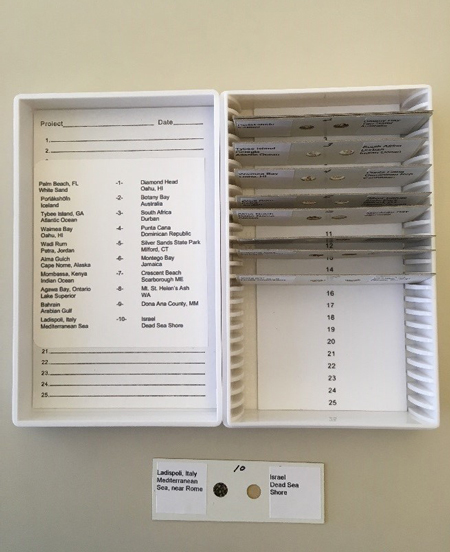
Each sand sample can be labeled the using a standard microscope slide label or by writing on the slide with a pen or pencil. As your collection grows, your sand samples can be stored in a traditional 25 capacity microscope slide box along with an index of your samples inside the slide box lid.
Sand Study Cards
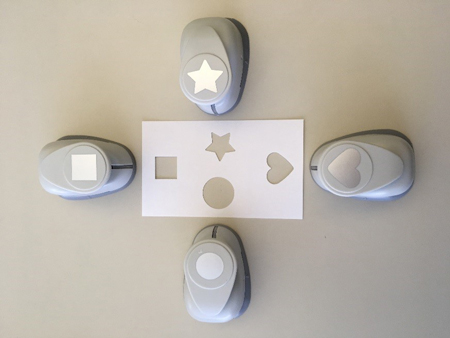
A slightly different take on the cardboard microscope slide preparation is the sand study card put forth by Bill Beiriger, a longtime sand collector. Beiriger uses 3″ x 5″ index cards, and rather than using a single-hole punch, he employs a paper punch used for scrapbooking. Of the four scrapbooking punches that we bought at the local hobby store (see image below), Beiriger prefers using the 18 mm square variety rather than the 25 mm round, citing that the setback for the round one is closer to the edge of the card as compared to square one, creating a greater opportunity for the edge of the card to tear.
In a similar fashion to creating the card stock microscope slides, a piece of tape is affixed to the back side of the index card creating a substrate of adhesive from the tape for the sand to adhere. In experimenting with all four of the scrapbooking punches, we did settle on the round punch. While we appreciate Bill’s concerns for using the round punch, we felt that the tape used on the back of the card provided enough support to the edge of the card to guard against ripping. We also thought that the star- and heart-shaped punches could be used to represent favorite or important sand samples within a collection.
In looking at the sand study cards, you can see that there is a lot of white space in which to document all sorts of information about where the sand was collected and your observations. We thought the white space on the card also lent itself to the opportunity of creating a visual around the collection of the sand sample. The cards below are a mash-up of Beiriger’s sand study cards with what is referred to in education as a one-pager. The concept of a one-pager is for students to express through drawing and writing important takeaways of significant historical events. For this blog we employed an elementary school student to capture graphically what was going on when they collected sand samples on a recent vacation. The story these images tell is how fun it was running from the incoming waves of the Pacific Ocean and being buried on the beach in sand by your cousin (see illustrations below).
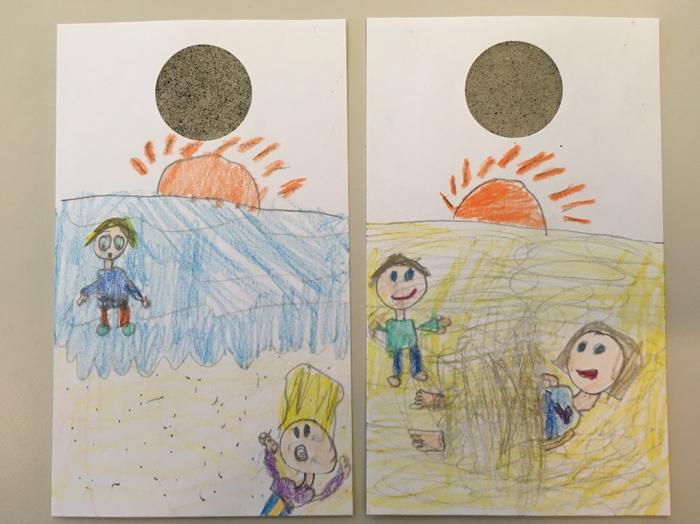
This is a great way for sand collectors of all ages to capture their sand sample along with recording memories of the outing all in one easy to access place. You can use each one-pager card to record more information such as collection location, date and other important notes. For more information about one-pagers see Jennifer Gonzalez’s interview with Betsy Potash (Cult of Pedagogy).
Sources of Sand
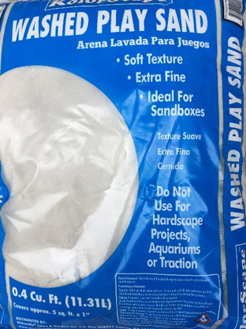
If your beach vacation has passed and you are back home finding yourself without a source of sand, there are other places to turn to, including your local DIY store. Many of these stores carry both natural and unwashed play sand, along with a wide variety of sands for leveling and installing concrete and brick pavers. Many times at these stores there will be a bag or two of the sand that has broken open. Ask the store salesperson if you can take a small amount of sand from the opened bag for your sand collection.
The Microscopy Society of America’s Sandbox is another great free resource that you can turn to for acquiring sand. Teachers can choose up to six samples from the Sandbox inventory of more than 500 sands from all around the world. The Sandbox is an outgrowth of Activity 8 from Microscopic Explorations, a GEMS/MSA teachers’ manual that helps middle school teachers introduce the microworld with written materials and instructions for 10 classroom lessons. You can check out the Sandbox sand sample inventory by visiting the Microscopy Society of America’s Project MICRO SANDBOX.
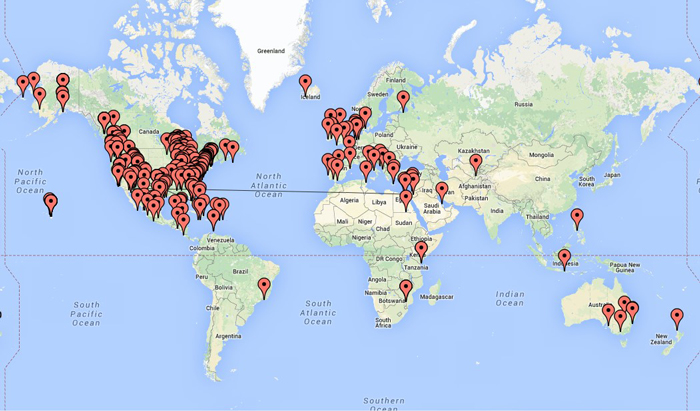
Although the Sandbox was originally intended to assist middle school science teachers in developing a curriculum that incorporates the use of the microscope, the decision was made early on not to exclude requests based on academic grade level, but rather to encourage participation from teachers at all levels of learning. This has resulted in a mix of participants from elementary schools introducing the concept of magnification, to college professors interested in the professional development of science teachers. The program has also honored requests from a variety of educational programs and institutions, including, home-school teachers, libraries, Girl Scout troops, charter school science teachers, science summer programs, after school science clubs, 4H environmental education programs, and children’s museums. Shipments of Sandbox sand samples is limited to locations within the United States. The MSA Sandbox also accepts sand donations.
Gallery of Sand
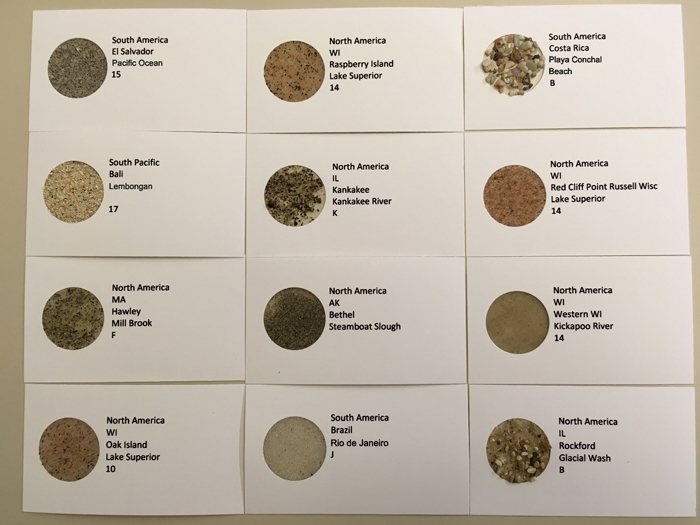
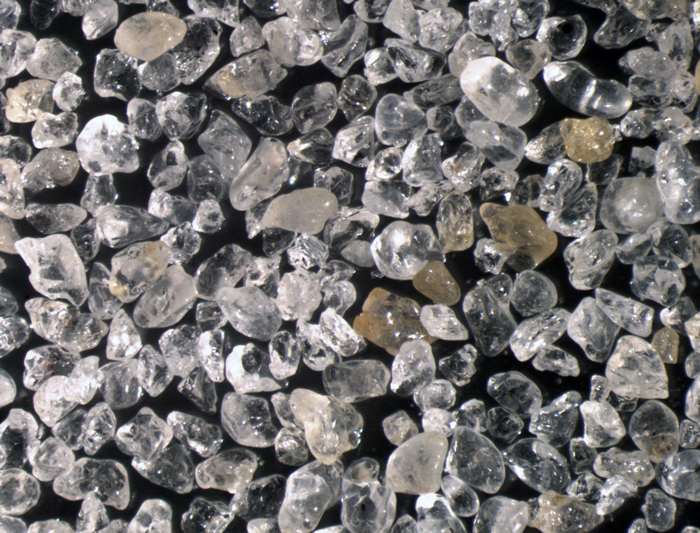
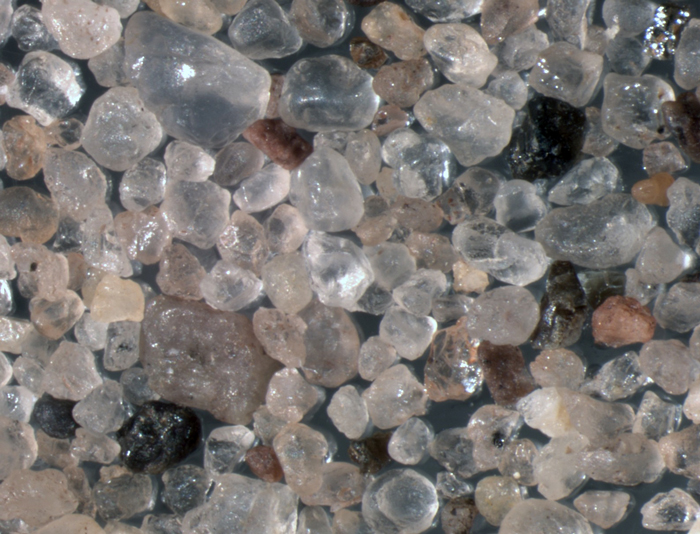
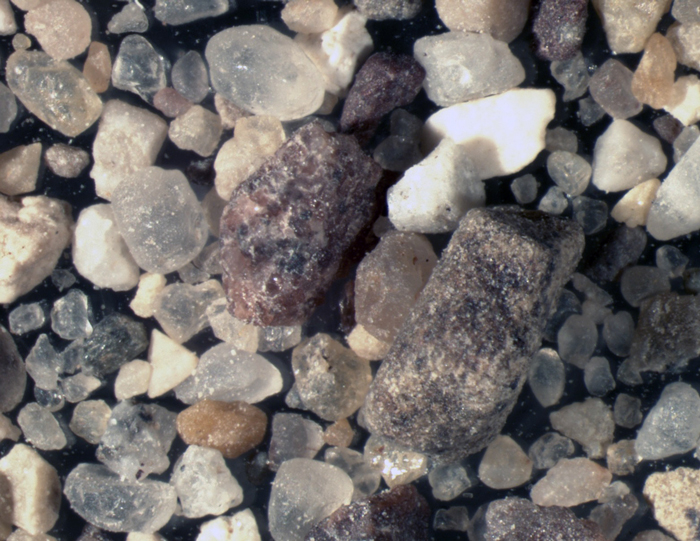
In an effort to enhance teachers’ interactions with the above-mentioned sources of sand, we have developed a sand gallery where educators and those who are just curious about what sand looks like through the microscope can view low-magnification images of sand samples. You can check out the gallery of sand below.
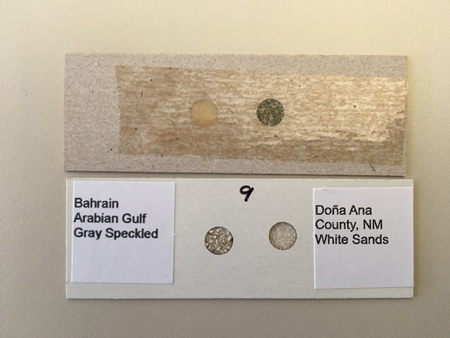
In preparing the sand samples for photography we decided to archive each sample using a variation on the sand study card idea. Rather than using an index card, each of the sands was fixed onto business card stock. We purchased a package of smooth edge business card stock sheets, which were run through a printer with the sample name and collection location printed on the card. After printing, we used the 25 mm hole punch to create an opening to deposit the sand sample. We backed each card opening with a piece of 3M archival transparent tape. Our thinking on the tape choice was that the adhesive and polymer used for an archival quality tape may last longer and not discolor as much over time. The cards were then placed into transparent business card holder sheets and compiled into a three-ring binder that can be accessed quickly for future study.
Producing the Images
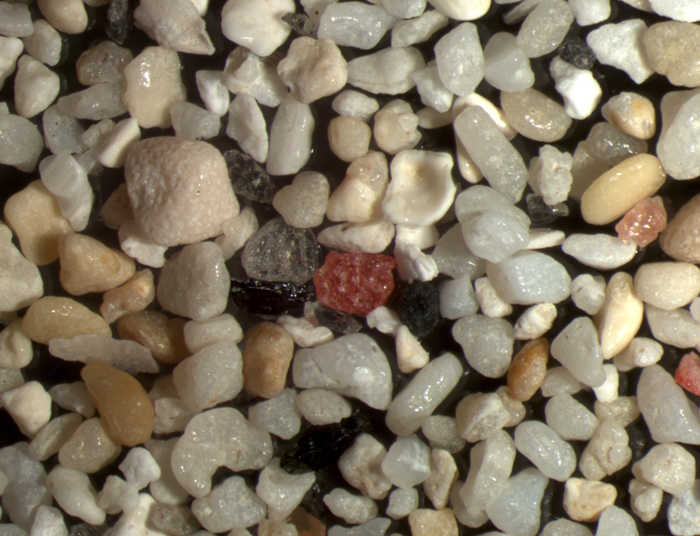
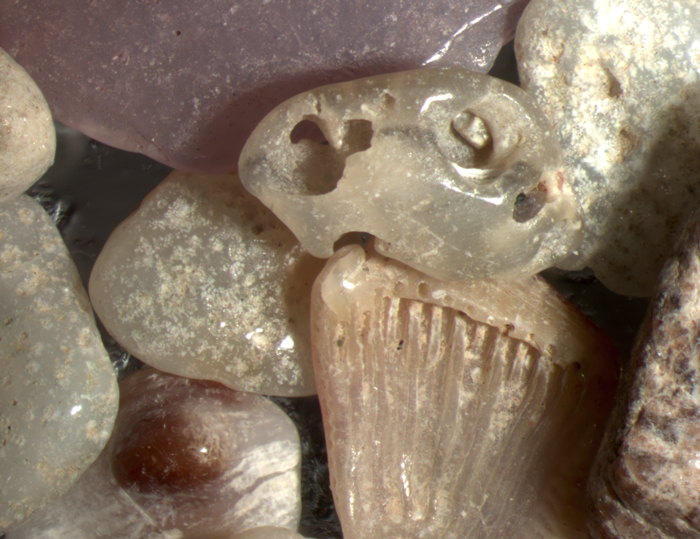
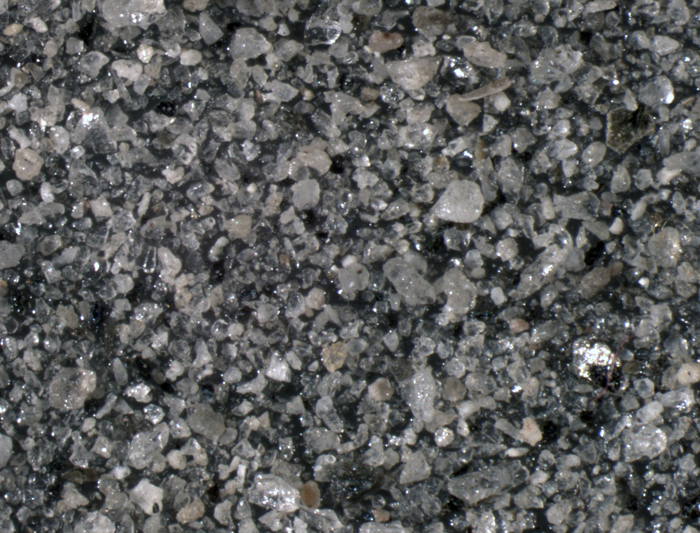
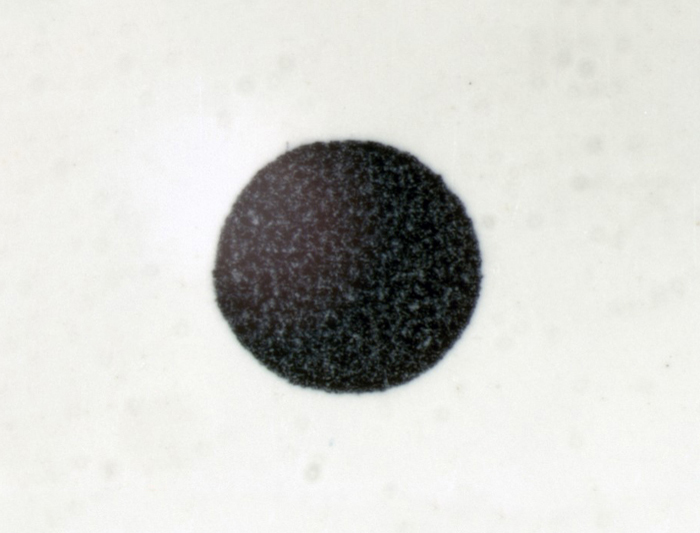
Each sand in the gallery was photographed using an Olympus SZX10 stereomicroscope at 25X magnification. We tried a number of different lighting conditions and settled on using a bifurcated fiber optic gooseneck. The images were captured and saved using a PAXcam ARC+ digital camera. Each image was saved at a camera resolution setting of 1616 x 1216. As you can see from the image above, some of the sand grains are quite coarse and have a wide range of sizes, causing a depth of field problem. Even at this low magnification, it can be challenging to have both the largest sand grains in focus, as well as the very small ones. To overcome this depth of field problem, we elected to use Helicon stacking software. The software is relatively inexpensive and easy to use. It also does a great job of bringing into focus all of the sand grains that span a number of different focal planes. We have also included an image of a 1 mm dot captured at 25X magnification to be used as a comparison scale for the sand images.

We will add more sands in the coming months to our Gallery of Sands on Modern Microscopy.
Now that you are equipped with a number of interesting ways to collect, study, photograph, and archive sand samples, we would love to hear how you are using your sand samples in the classroom.
Comments
add comment