Microscope Activities, 14: Calibrating Fine Focus Control
In the past, Hooke College of Applied Sciences offered a microscopy workshop for middle school and high school science teachers. We thought that these basic microscope techniques would be of interest not only for science teachers, but also for homeschoolers and amateur microscopists. The activities were originally designed for a Boreal/Motic monocular microscope, but the Discussion and Task sections are transferable to most microscopes. You may complete these 36 activities in consecutive order as presented in the original classroom workshop, or skip around to those you find interesting or helpful. We hope you will find these online microscope activities valuable.
EXPERIMENT 14: Calibrating the Fine Focus Control
Goal
To calibrate the fine adjustment knob so that depth measurements may be made.
Level
Intermediate-Advanced
Materials Needed
Dial Indicator ($7-$170) (Dial Comparator Stand); All Purpose White Correction Fluid.
Procedure
The fine adjustment knob of most microscopes—and all research-grade microscopes—is graduated, usually into 100 parts, with each division representing 2 μm. The Boreal/Motic microscope is not graduated. In this experiment we will calibrate the fine adjustment knob, so that depth measurements may be made. To calibrate the fine adjustment knob, proceed as follows, with reference to Figure 14-1:
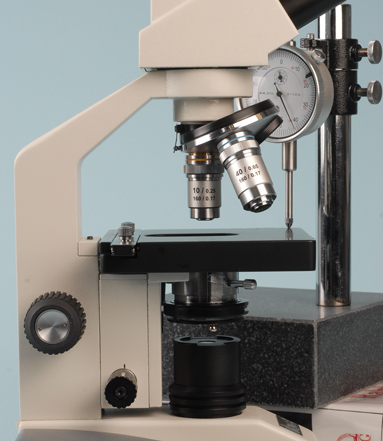
- Place a dial indicator (dial indicator stand) next to the microscope, in such a way that the plunger of the dial indicator makes contact with the microscope stage, and the reading on the dial is less than zero (to the left of “0”).
- Rotate the fine focus knob so as to raise the stage, thus pushing the plunger of the dial indicator upward, and stop the rotation when the needle comes to “0” (zero).
- Using white correction fluid, paint the uppermost rib of the fine focus knob, and with a black marking pen draw a reference fiducial line on the body of the stage carrier, in line with, and immediately above the white rib of the fine focus knob, as illustrated in Figure 14-1.
- With the needle of the dial indicator now set at zero, rotate the fine focus knob for ten complete turns, counting the white rib as it comes around again to keep track of the turns.
- Read and record the dial reading at the needle. Notice the dial reading in Figure 14-1: at the needle, it reads 0.042 inches, to convert inches into millimeters, multiply 0.042” by 25.4 mm per inch, equals 1.0668 mm. That is the distance that the stage moved up for ten full turns of the fine focus knob. Dividing 1.0668 mm by 10 turns, equals 0.10668 mm per single turn, or, 106.68 μm per one full turn.
- Next, count the number of ribs on the fine focus knob. There are 18 ribs on the fine focus knob of our microscope. Dividing 106.68 μm by 18 equals 5.93 μm, or, rounding up, say 6 μm/rib.
There…..not bad….. 6 μm / division (rib). That value should be recorded on a narrow piece of slide label, and affixed to the stage carrier just above the fine adjustment knob.
Discussion
One has to be careful about the way that depth measurements are made using our calibrated fine adjustment; there are two considerations—one mechanical, and one optical.
From the standpoint of mechanics, there will be play in the gearworks and/or threads. That is because the moving and engaging parts cannot be made to friction fit; or rather, they can, but it would not be practical to do so (the Boreal/Motic microscope fine adjustment operates via a tapered shaft).
Say we want to measure the thickness of a coverglass. If you focus back and forth, trying to find the best focus for the upper surface of the coverglass, you will introduce an error from the start. Start above best focus for the surface, and turn the fine focus knob in one direction—down—slowly, until best focus of the surface is reached. Record the reading of the fine adjustment knob by noting which rib is lined up with the fiducial mark.
Next, move the slide with the coverglass away from the center of the field of view, and continue to focus downward, until the slide is now in sharp focus—again, approach this plane slowly and carefully, so as to avoid focusing back and forth, introducing still more error. Record the reading of number of ribs and/or full turns, and multiply by 6 μm per rib.
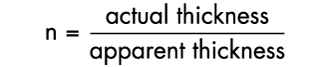
Why did we move the coverglass out of the way to record, first, the top of the coverglass, and, second, the top of the slide? Why not just focus through the coverglass and focus on the slide? This brings up the second consideration; the optical one. If we were to focus on the top of the coverglass, and then, through it, to the bottom of the coverglass (top of the slide), and take the difference between the two readings, and multiply by 6 μm, the thickness that we get will NOT be the actual thickness of the coverglass; it will be the apparent thickness. This error is due to not taking into account the refractive properties of the glass; specifically, to obtain the actual thickness, we need to multiply the apparent thickness by the refractive index of the glass (n =1.52). This is true of any transparent specimen whose thickness we wish to know by focusing through it, from upper to lower surface:

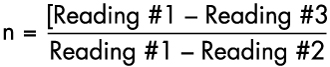
Note that by transposition, we can obtain the refractive index of any transparent specimen!
To do this, we focus on the upper surface of the specimen (Reading #1); then, focus through the specimen to the lower surface (Reading #2); and then, move the specimen out of the way and focus on the top of the slide (Reading #3).
This procedure is rarely done in actual practice, but it is a good exercise to become familiar with a calibrated fine adjustment.
Task
Calibrate a fine adjustment—or verify a graduated fine adjustment—by using a dial indicator as described in the Procedure section.
Comments
add comment